Syrniki (traditional cheese pancakes made in many Eastern European countries) are something I've not had in AGES!! My memories of them are from very early childhood -- one of my babushkas loved making them for me as a treat (whose babushka didn't, right? ;) ). Recently, while working on another recipe for rasmalai I came up with a dairy-free "cheese" base that I intuitively knew would be just perfect for making vegan syrniki -- and perfect it was!

I finally had the opportunity to test out my hypothesis this week and wow -- I can't believe syrniki are happening in my kitchen is all I can say! :P

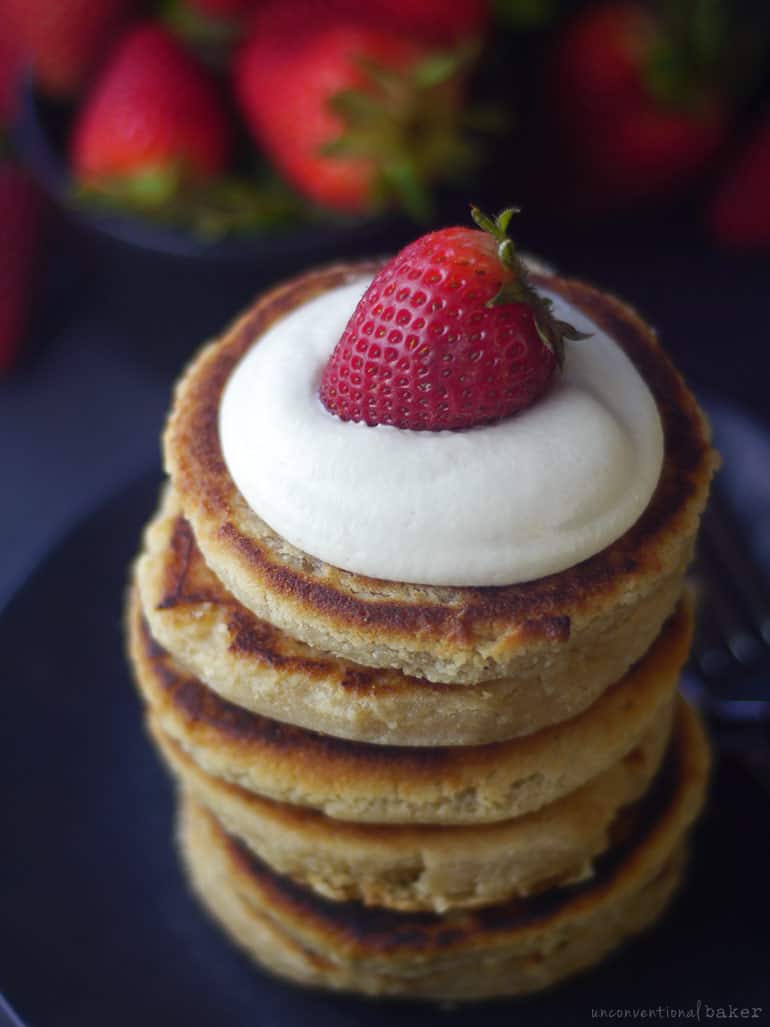
Syrniki are slightly different from regular pancakes. They have a bit of tang to them due to the "cheese," so there's the flavor difference. But most importantly, it's their texture that makes them unique and very satisfying. The outside of the pancakes is lightly crisp, while the inside is soft and has a moist yet crumbly texture to it. If you've never tried them -- it's totally worth the experience :)
They're traditionally topped with sour cream and jam. Sometimes they're dusted with powdered sugar. You can serve them with a bit of maple syrup and fresh fruit as well. The favorite toppings around here though, are sour cream and jam --- the best combo in my opinion.
For the sour cream, I wanted to make something from scratch and used this basic cashew-based sour cream from Oh She Glows and it worked a treat. (I made ⅔ of the recommended amount and it was plenty enough). The sour cream adds more tang and creaminess, and the jam (not pictured) adds a lovely fruity sweetness.

Just a few quick notes on the recipe before you jump in:
- It's a two part recipe, and one part (the cheese) needs to be made a day ahead (or the night before), so keep that in mind while planning for these.
- It's a small batch recipe and makes 8 small pancakes, which I think is good for an average 2-3 small servings (3-4 pancakes per person). It can easily be doubled though.
- My grandma used to make these with a ton of oil. I know traditionally sometimes that's how it goes. They can be almost deep fried... but I'm not a fan of deep fried things, so I tried to go light on the frying oil, adding a little more of it in the process as needed. So just use your judgment. If it looks like the pan is a little too try, add a touch more oil and keep frying.
- Making pancakes is a bit of an intuitive thing. It's hard to pin down exactly how many minutes each side should cook for, what temperature your stove should be at, etc. You just have to use your best judgement along the way (though I wrote down what worked for me). That said, it's also a pretty easy and forgiving recipe, so don't stress. Just keep an eye out your syrniki... if it looks like they're ready to flip, flip. If, while trying to flip, the bottom feels too stuck or they feel way too soft, cook them longer. If they seem to be starting to burn, lower the temperature, etc. You learn from experience pretty quickly on things like this though :)
- Check the notes section on the recipe card below for some ingredient alternatives and extra tips. I know some of you are sensitive to cashews, or might want to make this with wheat flour, or don't use rice, and so on -- so you can see some suggestions below the recipe for other ideas.
P.S. I'm playing around with a grain-free version of these, so will report back when I've got it figured out ;)
Enjoy! :)
Vegan Syrniki (Cheese Pancakes)

These vegan syrniki are a spin on a traditional Eastern European cheese pancakes recipe, remade here from scratch to be dairy-free, eggless, refined sugar-free, and gluten-free.
- Prep Time: 30 minutes
- Total Time: 30 minutes
- Yield: 8 pancakes
- Category: Breakfast
- Cuisine: Dessert
Ingredients
"Cheese":
- 1 ½ cups raw cashews,* pre-soaked and strained**
- 3 tbsp apple cider vinegar (or lemon juice)
- 5 tbsp maple syrup
- ½ cup hot water (should be hot/very warm, but not boiling)
- ⅛ tsp salt
Pancakes:
- 10 tbsp white rice flour***
- 3 tbsp potato starch****
- ¼ cup maple syrup
- 1 tsp pure vanilla extract
- ½ tsp salt
- a bit of olive oil (or vegan butter) for frying
Toppings:
- vegan sour cream (I used this recipe from Oh She Glows) and jam, maple syrup, etc.
Instructions
1. Blend all “cheese” ball ingredients in a high power blender until completely smooth. Pour this mixture into a nut-milk bag (over the sink), place the nut milk bag onto a small strainer over a bowl, gently twist the top of the nut milk bag closed, and refrigerate overnight (or for at least 8-10 hours).
2. If making sour cream from scratch for the topping, can prepare it ahead of time as well so it's ready for use when the pancakes are.
3. When the "cheese" is ready, transfer the soft cheese ball into a medium-sized mixing bowl (discard the water that collected in the bowl under the nut-milk bag while the cheese was forming). Add remaining pancake ingredients (except olive oil) to the mixing bowl and stir everything together thoroughly with a spoon to combine.
4. Add a little bit of olive oil to a non-stick skillet (or skillet of your choice + more or less oil as needed) and warm up to a medium temperature (my stove temp goes from 1-9, and I made these mostly on 5, sometimes lowering to 4 for a bit), whirl around the oil on the pan a bit to lightly coat the base (or use a pastry brush to spread the oil around). Once the skillet is warmed up, use a 2 tablespoon cookie scoop with a trigger***** to scoop up some of the batter to place onto the skillet (depending on the size of your skillet can add several at a time -- I did 4 at a time for these on a medium-large skillet; just be sure to leave some space between them for comfortable flipping). Press the batter balls down lightly with the back of a spoon to flatten a little (don't worry if they're not perfectly flat at this point). Cook for 2-4 minutes, then flip using a spatula, press each pancake down with the back of the spatula to flatten the pancakes more, and cook for another 2 mins. Add a bit of oilve oil to the pan as needed while these are cooking. It also helps to slide them around the pan a little while they're cooking, though not essential. Once ready, remove onto a plate and repeat with the remaining batter until done.
4. Top with your favorite toppings and enjoy warm!
Notes
*If sensitive to cashews, the cheese can be made with almonds instead (following the same procedure).
**To pre-soak cashews: place in a glass bowl, cover with water, and leave to soak for 4 hours (or overnight in the fridge). Then strain and discard the water. For a quick pre-soak, cover with boiled water and soak for 15 mins, then strain and discard water. (Note: this quick soak technique doesn’t preserve the nutrition of the recipe as well as the traditional soaking technique above). Note: the purpose of soaking the nuts is to re-hydrate them and plump them up for blending into a smooth, cheesecake-like consistency. Proper soaking techniques also maximize nutrition and digestibility. If you’re interested in learning more about nut soaking and other dessert prep tips and tricks, I delve into these subjects in detail in my book Unconventional Treats.
***Brown rice flour would work well too. I haven't tried with other gluten-free flours, but I suspect quinoa flour, oat flour, sorghum, or millet will probably work well here. Alternatively, if not gluten-free, you can try substituting the rice flour + potato starch with an equal amount of AP flour. If you give any of these alternative versions a try, I'd love to hear how they turned out in the comments.
****Can use tapioca starch or arrowroot as a substitute.
*****The cookie scoop with a trigger makes portioning and shaping easy, and makes the sticky batter easy to handle. Alternatively you can use a spoon to scoop batter into the skillet.

Mackenzie Meachem says
Hi there! I'm allergic to all nuts except walnuts and pecans, do you have any suggestions to make the cheese without Cashews or Almonds?
Thank you!!
Audrey says
Hi Mackenzie. I once made these in a pinch with just regular Tofutti cream cheese which I mixed with a bit of maple syrup. It worked out great :) You need about 2.5 cups of the "cheese" mixture total, so I'd do 2.25 cups Tofutti (as an example, feel free to use another similar nut-free product) mixed with .25 cup maple syrup using a hand mixer, and you'll be good to go. Hope that helps!
Jana T. says
Made these today. The cheese making process was so interesting. The pancakes tasted amazing. This is such a special breakfast we're going to save it for special occasions. Thank you!
Audrey says
Oh good, so glad you enjoyed these! :) Thanks for the feedback.