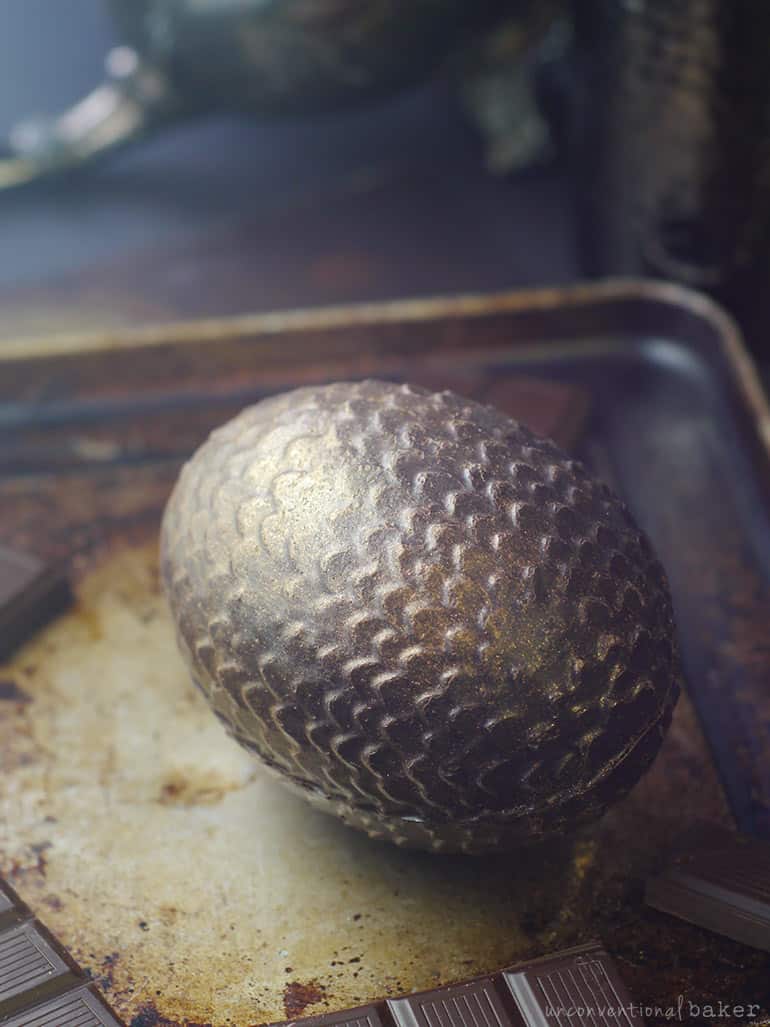
This was a bit of an unusual post for me last year because... when you're too late in the season to share a chocolate egg recipe, you make shimmery chocolate dragon eggs instead ;)
The idea for these actually came from Instagram.. I was browsing one day and found myself looking at what I thought for a moment was a chocolate dragon egg, but what turned out to be a candle... delicious, right?!
Nonetheless it left me wanting a chocolate dragon egg. A quick internet search confirmed you can indeed get giant chocolate egg molds that looked like dragon eggs... plus some pretty edible shimmery dust for extra sparkle and I was in business!
Now hopefully you've got some kind of a Game of Thrones party to bring these to... ;) Otherwise, this recipe can be a starting point for all kinds of golden chocolate eggs, shimmery chocolates, and other "glittery" dessert decorations.

The shimmer part is what I'm most excited about to be honest. Recently on several occasions while shopping for ingredients for special custom cakes I found myself wanting to use some glitter. But every time I picked up one of those classic little plastic jars I found myself putting it down. Some of the usual suspect sketchy ingredients always put me off.
This time with chocolate dragon eggs in mind, I thought to look a bit harder and ended up finding some decent edible glitter in an unexpected place: The All Natural Face, a vegan cosmetics company that carries a line of fully edible shimmer dusts. The ingredients are: organic cornstartch, raw sugar, madagascar vanilla, mica. That's not bad at all compared to the conventional versions I've seen around. The only downside is the lack of blues, greens, reds, and purples -- the only colors available are neutral. The extra colors would have definitely made for prettier dragon eggs, but if it means I get to avoid eating extra funky stuff, I'll take my neutral shimmer and have a blast :)
For the record, this is the dust I used specifically: vanilla sparkle.
Note: you're also of course welcome to use whatever shimmer dust you prefer. If you choose to use the conventional ones, I won't judge -- pinky swear! ;) Otherwise, look around because there might be other local options available to you.
The photos don't really convey the shimmer all that well. Even the quick video I shared above from Instagram doesn't show off how pretty these look in person, but at least it should give you an idea of what to expect.

For the chocolate here, I used coconut sugar which makes the chocolate crunchy. It was just a preference thing -- I love Mexican-style chocolate, and this brings it close to that. If you prefer, you can use maple syrup instead to make it a smoother chocolate, though it will make a thinner chocolate mixture and that means you might need to add a third coat of chocolate to the inside to thicken things. For the record, the "crunchiness" isn't going to be visible on the outside of the egg, it's just the texture when you bite in.
Alternatively though, you can just use your favorite brand of chocolate instead -- just melt and use in place of the DIY chocolate specified in the recipe. You'll probably need about 1¼ cups of it (melted).

For the filling, my favorite filling for these was just chocolate-coated almonds (like these ones). It's fun and easy, and made the egg nice and light. Because the dragon egg molds are larger, filling it with a cream, etc. is a little less practical, which is why I prefer the chocolate almonds route.
However, practical shmactical.... ;) I tried a version with this almond butter filling and the combination of the crunchy chocolate and the delicious almond butter cream was amazing. So I'm including a version of that in the recipe in case you wanted to give it a try.
If you're going the whole shimmer and impress route with these, I'd go with the almonds, but if you're just looking for a homemade tasty chocolate + almond cream treat you can just make little chocolate egg nests or boats and call it a day. Or you can bind the almond-filled eggs for a full egg look as well. Up to you -- options... :)

One final note I'll leave you on here with: if using shimmer dust on the eggs, be careful of sudden temperature changes. For example if you keep the eggs FROZEN and then bring them out to room temp and frost, within a few minutes your eggs will begin to frost over with moisture due to the sudden temperature change and the dust might lose some of its luster as a result. That is why once the chocolate initially sets in the mold I recommend letting it sit in the fridge for a few hours as the temperature change from fridge to room temp isn't as strong. They'll be fine in a slightly colder than room temp room as well. Alternatively, you can use regular melted chocolate (not the raw-ish version in the recipe) and that will make them more temp stable if you wanted to put your eggs out on display at room temp for a lengthier period of time.
RECIPE UPDATE:
Here's a video from Janel to show you how it's done (GoT style!):
PrintChocolate Dragon Eggs
Giant sized vegan chocolate eggs dressed up as "dragon" eggs :) with options for crunchy and creamy almond filling.
- Prep Time: 1 hour
- Total Time: 1 hour
- Yield: 1 large dragon egg
- Category: Chocolate
- Method: Raw
- Cuisine: Dessert
Ingredients
Chocolate Egg:
- ½ cup cacao butter, liquified (but not hot!)*
- ½ cup cocoa powder**
- ⅛ tsp raw ground vanilla bean***
- ⅛ tsp salt
- 10 tbsp coconut palm sugar
- 1 tbsp maple syrup
Optional Almond Butter Filling:
- 4 tbsp smooth almond butter
- 2 tbsp maple syrup (or coconut sugar for a thicker mixture)
- 2 tbsp almond milk
- ⅛ tsp salt
Coating:
- edible glitter dust (I used this one)
Special Equipment:
- dragon egg chocolate mold
- a clean brush to apply shimmer dust with (like a makeup brush or a painting brush)
Instructions
1. Place the dragon egg mold on a small metal tray in the freezer for 20 mins to chill.
2. Place all chocolate egg ingredients, except coconut sugar and maple syrup, in a small glass bowl (I used my 2 cup glass measuring cup as it's easy to pour out of it in the next step) and stir together with a spoon until all cocoa powder clumps are dissolved and the mixture is smooth. Add in the coconut sugar and maple syrup and stir it in to incorporate. Allow this mixture to cool slightly until it's still stirable but not hot.
3. Have a large glass bowl handy on the counter. Pull the mold out of the freezer (keep it on the metal tray). Pour in enough of the chocolate mixture to fill each cavity in the mold ⅔ of the way up. Swirl the chocolate around in the mold to make sure all sides are fully coated. Flip the mold upside-down over the bowl to pour out the extra chocolate from the center of the mold into the glass bowl to empty it out (so the eggs become "hollow"). Flip the mold back up and place on the metal tray. Wipe of extra chocolate around the egg cavities. Freeze for 15 mins to set.
4. Repeat step 3 to add a second coating of chocolate to the eggs and then hollowing out the center by pouring out excess chocolate mixture back into the bowl. Note 1: before getting started on this step, make sure your chocolate mixture is still liquid enough to pour and coat. If it looks like it thickened a bit, warm it up very gently in a double boiler and stir before re-filling the eggs. Freeze for 20 mins to fully set.**** Note 2: Optional: you might want to repeat this step a third time for a thicker coating around the edges of the egg.
5. If you're planning on filling the eggs with the almond butter mixture, prepare the filling by briefly blending all filling ingredients together in a small blender (I used my magic bullet for that). Once the chocolate is fully set, carefully unmold the chocolates egg halves, flip the egg halves with the hollow part up and divide the almond butter mixture between the egg halves, smoothing it out lightly. Refrigerate the egg halves for several hours.
6. To join the eggs, warm up a baking tray in the oven until it's hot to touch (hot enough that chocolate would melt if it landed on it). Pull out the egg halves from the fridge. Briefly lay the hot pan (using oven mitts, of course!) over the top of the eggs so that it warms up the rims and melts the chocolate very slightly. Then quickly cover one half of the egg with the other, making sure the ends join together well all around. Refrigerate for 10 mins for the egg to fully set and be stuck together. ALTERNATIVELY, instead of heating up the tray and melting the chocolate egg edges to make the ends join, you can instead use some of the leftover melted chocolate to drizzle around the edges of the chilled eggs, join the two halves together, and chill briefly to make the chocolate set and bind.
7. To coat the egg with sparkling dust, simply brush the dust on lightly with a small brush all around. You can do multiple coats for a stronger shimmer or just do one coat for a very light sheen.
Notes
*Cacao butter (also known as cocoa butter) gives these quick DIY eggs a beautiful chocolate flavor. Note that it's important to make sure it's completely melted, but lukewarm. If your cacao butter is too hot it will make the sugar in the recipe clump up and the oils separate, ruining the recipe. Moreover, if your mixture is too warm it will not adhere properly to the chocolate mold, resulting in improperly formed or thin "eggs." So make sure to give it enough time to cool off after melting to be liquid but barely warm. If you need help with working with cocoa butter, melting it, etc. see Unconventional Treats -- there's a video tutorial in there you'll probably find useful. Can also use coconut oil instead, but it will melt faster and be somewhat less flavorful.
**Can also use raw cacao for a fully raw version, but I used cocoa powder here for this recipe.
***The raw ground vanilla bean gives the chocolate a beautiful flavor, but if you can't find any, then skip. Adding an alcohol-based vanilla extract as a substitute might cause the mixture to seize up.
***Can use the extra chocolate leftover to make chocolate bark or smaller chocolates.


Leave a Reply